Right back at the beginning of this project, day 2 I believe, we decided to remove the bulkhead from the van (bit.ly/7Bulkhead) – it was an easy job which gave us some additional space and a lot more light. The plan was to build a half bulkhead, just behind the driver’s seat, which would house the battery/wires when we did the electrics and be a bookshelf facing into the van – one piece of furniture having two functions is the minimum we aimed for.
As mentioned in the electrics post (bit.ly/23Electrics) the bulkhead, bed and electrics were all done intermittently over a couple of weeks, but for ease I am ignoring chronology and writing up each section on its own.
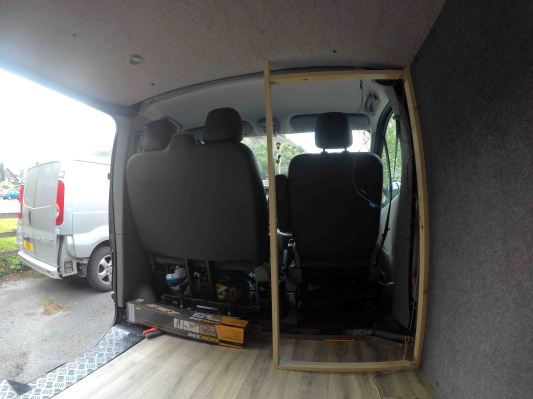
We planned that the bulkhead would be the same depth as the sofa/seat that would run along the length of the van. This seat would pull out to make our bed, so we had to work out the width of the full bed, work out what depth it would have to be at its smallest (with the bed away) and that would be the depth of our bulkhead. It was fairly easy to work out and rather quickly we were moving onto the building stage – after a trip to the local timber merchants, of course!
We started with the back frame, attaching the wood to the wall and building the rest from there. It would have been fantastic to be able to just copy the dimensions, however the varying width of the wall would have caused problems, this meant that each individual piece of wood was measured and cut as and when it needed to go in.
The back frame was followed by the front and the adjoining pieces went in last to make it one (sturdier) structure. We starting the build using right-angled brackets, however we very quickly realised it was going to end up a mess of metal plates in all the corners and switched to using the pocket-hole jig that we bought for the project. This did require us to redo some of the joins but it was well worth it in the end.

The pocket-hole jig drills an angled hole into the wood at the correct angle for a screw to hold the 2 pieces together, making the butt joint much stronger. It also made the finished job look much neater as there were no screw heads/brackets on display on any part of the frame. We bought the Kreg set, which came with some screws (although we did have to buy more) and would highly recommend it for both aesthetics and ease of use (https://www.amazon.co.uk/Kreg-185823-Jig-R3/dp/B0088CPBRE/ref=sr_1_4?s=diy&ie=UTF8&qid=1539338893&sr=1-4&keywords=kreg+pocket+hole+jig)

The next step was to box in the frame – using cardboard boxes we created a template and used the jigsaw to cut it out from a sheet of 3mm ply. Using the cardboard allowed us to get a pretty true shape even when faced with the curve of the ceiling. We cut out one piece for the inside back and used the same template to cut an identical piece for the outside back, the cavity between would house the wires for our electric set up.

Next to go on was the side panel, this only needed one piece for the outside of the frame as the cavity was not needed for anything and would therefore be better used as extra space in the bookcase. Again, we created a cardboard template before jigsawing the main shape. With both the back panels and the side panel, we planed off any excess before screwing it in place.
Having reached a perfect fit, we needed to cut the hole for our electric panel. We decided to place this on the side of the bulkhead – close to the battery, conveniently located when entering and exiting the van by the side loading door and the shelves would offer somewhere to put our items while they were plugged in and charging. We measured meticulously to ensure the hole was cut symmetrically. The switches, 12v and USB chargers on the panel will protrude into the back of the bookcase, we will have to box this in once everything is in place but that will have to wait for our reclaimed pallet-wood cladding to go on. We will cover the entire electric panel process in one go, once it is completed.

We are at that stage where everything seems to rely on or be halted by another job, work is being done in segments and unfortunately no job is reaching completion – I have no doubt that everything with suddenly be finished in one day once all the pieces fit together. However for now we will have to make do with the progress that can be achieved in each interval.
So… the last thing for us to do at this stage, this interval, was to make the compartment to house the battery. We worked out the height of the shelf, using the height of the sofa/bed and screwed four right-angled brackets in place on the frame of the bulkhead. Using a left over piece of 9mm ply we cut the shelf and planed for an exact fit (there was a fair bit of trial and error due to the irregular dimensions of the bulkhead. Needing access to the battery at all times, we decided not to secure the shelf in place but instead to just use to brackets as support and the snug fit of the shelf itself to stop it from coming out unwantedly.


Ooh patience is required as its one pigeon step at a time. But worth it as it is all looking good. You haven’t started on the Papa Bear bed yet. Don’t take too long as I am a pensioner already!
LikeLike
It’s definitely getting there – but sorry… no room for you! You will have to make so with the pop-up tent outside 😀
LikeLike